When most people think of vanilla, they imagine a small brown bottle labeled “extract” or perhaps the crisp scent of vanilla-scented candles. But if you’ve ever stepped into a professional bakery, you’d discover something deeper, richer, and more aromatic than extract: vanilla paste. Specifically, a homemade vanilla paste that offers bold flavor, speckled beauty, and authentic complexity.

I remember the first time I saw it in use. It was during a culinary internship in Provence, France, where I assisted an aging patissier known for her rustic mille-feuille. Instead of reaching for a bottle of extract, she brought out a glass jar filled with a thick, syrupy mixture—dark brown, sticky, with visible specks of vanilla. As she spooned it into her pastry cream, the scent filled the room. Not just sweet—earthy, warm, floral, spicy, and deep. That was my introduction to vanilla bean paste.
Back home, I started to experiment. Store-bought options were too expensive or filled with additives. Making my own became a journey—refining each batch until the flavor was just right and the texture smooth enough to pour but thick enough to stick to a spoon. Today, my vanilla paste recipe has become a staple in my kitchen, replacing extract in everything from cookies to panna cotta.
In this guide, I’ll show you how to make your own easy vanilla paste, step-by-step, with the richness and depth you’d expect in high-end restaurants—but simple enough for home baking.
Vanilla Paste Recipe – Bold, Homemade & Easy
Equipment
- Equipment You’ll Need
- To keep things simple, this easy vanilla paste recipe uses standard kitchen tools. Here’s what you’ll need:
- Sharp paring knife or kitchen scissors
- (To split and scrape the vanilla beans)
- Cutting board
- (Protects surfaces and makes seed-scraping easier)
- Small saucepan
- (For simmering the syrup and infusing the beans)
- Spatula or wooden spoon
- (To stir the syrup without damaging the beans)
- Blender or mini food processor
- (Essential for creating a smooth, thick paste)
- Fine mesh strainer or cheesecloth
- (To remove any fibrous pieces or clumps)
- Glass jar with airtight lid
- (Stores your finished paste safely in the fridge)
- Measuring Spoons and Cups
- (For accuracy—especially important in syrup-making)
- All of these tools are common in most home kitchens, and they make this vanilla paste recipe easy to execute in about 20–30 minutes.
Ingredients
- Ingredients You’ll Need
- Here’s everything you need to make this vanilla paste recipe at home. Each ingredient plays an important role in flavor texture, or shelf stability.
- Main Ingredients:
- 6 whole vanilla beans
- Preferably Madagascar or Tahitian; the fresher and plumper, the better
- 1 cup granulated sugar
- White sugar gives the cleanest flavor and helps form the syrup base
- 1/2 cup filtered water
- Ensures purity and clean extraction of flavor
- 1 tablespoon light corn syrup optional
- Improves texture and shelf life; you can substitute with honey or maple syrup
- 1 teaspoon lemon juice
- A natural preservative that helps stabilize the mixture without chemicals
- Pinch of salt
- Enhances the vanilla flavor and balances the sweetness
- 1 teaspoon pure vanilla extract optional
- Boosts aroma if your beans are not very fragrant
- Substitutions and Notes:
- Vanilla powder 2 teaspoons can replace vanilla beans in a pinch, but you’ll lose the visual flecks and some flavor depth.
- Use brown sugar for a caramel undertone though it may darken the final paste.
- You can omit the corn syrup entirely but your homemade vanilla paste may be thinner.
- These simple pantry ingredients are all it takes to craft a bold flavor vanilla paste that’s far superior to commercial products.
Instructions
- Step-by-Step Instructions for Vanilla Paste Recipe
- This vanilla paste recipe makes about ¾ cup of rich, fragrant homemade vanilla paste, which equals approximately 12 tablespoons. Use these detailed steps to create your own at home.
- Step 1: Prepare the Vanilla Beans
- Start by placing the vanilla beans on a clean cutting board. With a sharp knife, slice each bean lengthwise from top to bottom. Carefully open the split beans and use the flat side of your knife (or a small spoon) to scrape out the tiny black seeds, also known as caviar.
- Set the seeds aside in a small bowl. Do not discard the bean pods—they’ll be used to infuse extra flavor in the syrup.
- Step 2: Make the Syrup Base
- In a small saucepan, combine 1 cup granulated sugar, ½ cup filtered water, 1 tablespoon light corn syrup (optional but recommended), 1 teaspoon lemon juice, and a small pinch of salt. Place the pan over medium-low heat and stir gently until the sugar completely dissolves.
- Keep the heat low. Once the mixture starts to simmer lightly, reduce the heat to avoid boiling. You want the syrup to stay clear and stable, not caramelize.
- Step 3: Infuse the Vanilla
- Add both the scraped vanilla seeds and the bean pods into the simmering syrup. Let them cook on low heat for about 5 to 7 minutes, stirring occasionally.
- As it simmers, the mixture should develop a slightly thickened, syrupy texture. You’ll notice the fragrance intensifies—sweet, warm, and floral, with hints of spice from the natural oils in the pods.
- Step 4: Blend the Mixture
- Remove the vanilla pods using tongs and set them aside. Carefully transfer the syrup and vanilla seeds into a blender or mini food processor.
- Blend the syrup on medium to high speed for about 30 to 45 seconds, or until you get a smooth, uniform texture with visible black specks. Be cautious if the syrup is still hot—use a kitchen towel to cover the blender lid to prevent any splatter.
- Step 5: Optional Straining
- For a smoother texture, pour the blended paste through a fine mesh strainer or cheesecloth into a clean bowl. This will remove any large fibrous pieces that remain from the pods. If you prefer a rustic, full-flavor result, you can skip this step.
- Step 6: Cool and Store
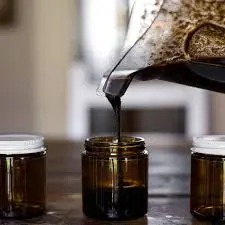
- Allow the paste to cool to room temperature before transferring it to a glass jar or amber storage bottle. Seal tightly with an airtight lid and refrigerate.
- The paste will continue to thicken slightly as it cools. It should have a spreadable, syrupy consistency, rich brown color, and noticeable flecks of real vanilla bean throughout.
- Use 1 teaspoon of vanilla paste as a direct replacement for 1 teaspoon of vanilla extract in any baking or cooking recipe.
What Is Vanilla Paste?
Vanilla paste, often called vanilla bean paste, is a concentrated form of vanilla flavoring made by combining the seeds of vanilla beans with a sweet syrup base—typically sugar and water, sometimes stabilized with corn syrup or a natural thickener. The result is a spoonable, thick liquid filled with tiny black vanilla seeds, often referred to as “caviar.”
Unlike extract, which is alcohol-based and often too thin for custards or frostings, homemade vanilla paste provides both visual flair and intense, bold vanilla flavor. It strikes a perfect balance between pure vanilla pods (which are expensive and harder to use) and vanilla extract (which can taste diluted or bitter if not high quality).
How It Compares:
- Vanilla Extract: Thin, alcoholic, and more volatile during high-heat cooking.
- Vanilla Pods: Expensive, labor-intensive, beautiful but not practical for daily baking.
- Vanilla Paste: Easy to store and use, economical, flavorful, and filled with real bean specks.
In short, the vanilla paste recipe you’re about to learn is the perfect blend of flavor intensity, ease of use, and professional-level results—without the fuss of extracting pods every time you bake.
Why People Love This Vanilla Paste Recipe
Ask any serious baker or dessert lover, and they’ll tell you—there’s vanilla, and then there’s vanilla bean paste. The difference is more than taste. It’s about texture, control, and purity. Here’s why this vanilla paste recipe stands out in home and professional kitchens alike.
Intensely Bold Flavor
This isn’t your everyday extract. Each spoonful of this bold flavor vanilla paste is loaded with the sweet, floral, and earthy notes of whole beans—without bitterness or artificial undertones. Unlike some pastes that are alcohol-based, this one is water-based, giving it a cleaner finish.
Real Vanilla Seeds in Every Spoonful
Those tiny black flecks? They’re more than visual decoration. They signal depth, quality, and true vanilla essence. These seeds infuse your desserts with a richness you just can’t get from extract alone.
Cleaner, Natural Alternative
Most store-bought pastes contain preservatives, thickeners, and stabilizers. This homemade vanilla paste skips all that. With just beans, sugar, and a touch of lemon juice for shelf-life, it’s as pure as it gets.
Versatile & Spoonable
Use it in cookies, custards, cakes, pancakes, whipped cream, coffee, and even smoothies. It blends effortlessly without overpowering, and unlike extract, it doesn’t evaporate during baking.
Cost-Effective in the Long Run
Yes, vanilla beans are pricey, but making a jar of paste stretches their value far further than extract or whole-pod use. Especially if you buy beans in bulk, this becomes a budget-friendly upgrade.
So whether you’re looking to level up your baking or just want a cleaner, richer vanilla option, this easy vanilla paste checks all the boxes—flavor, cost, and health.
The Healthy Cooking Method: Gentle Stovetop Simmering
Many people are surprised to learn that making homemade vanilla paste doesn’t require special equipment—or any alcohol. Instead, this recipe uses a gentle stovetop simmer method. Why is this important?
Low-Heat Extraction
Simmering vanilla beans in water and sugar at a low temperature allows you to extract the essential oils without degrading the delicate compounds responsible for vanilla’s rich aroma. Boiling destroys flavor. Simmering preserves it.
No Alcohol Required
Unlike vanilla extract, which must sit in alcohol for months, this vanilla bean paste is made with zero alcohol. That makes it ideal for families avoiding alcohol or for recipes where the alcohol taste interferes with the final product (like ice cream or no-bake desserts).
Quick and Safe
The entire process takes about 20 minutes from start to finish, making it a convenient weekend project. Plus, because you’re not dealing with alcohol or pressure-canning, it’s easy and safe for all home cooks—even kids helping in the kitchen.
Natural Preservatives
Adding a small amount of lemon juice and keeping the paste in the refrigerator helps prevent spoilage. No need for commercial preservatives or artificial thickeners.
In short, this method keeps the process natural, the flavor pure, and the paste safe for all uses.
| You may also like to Read: Irresistible San Giorgio Lasagna Recipe – Just Like Home |
Cost Breakdown by Serving
Vanilla beans are the most expensive ingredient, and prices may vary depending on origin (Madagascar, Tahitian, Mexican), quality (Grade A vs. B), and where you purchase them (online bulk vs. gourmet store).
As of current average market prices:
- 6 vanilla beans = ~$15 (if bought individually)
- Buying in bulk can bring cost down to ~$2 per bean
Below is a general estimate assuming bulk purchase at $2.50 per bean.
| Servings | Vanilla Beans Used | Total Cost | Cost per Serving |
| 5 tbsp | 2.5 beans | ~$6.25 | $1.25 |
| 10 tbsp | 5 beans | ~$11.25 | $1.13 |
| 15 tbsp | 7.5 beans | ~$16.75 | $1.11 |
| 20 tbsp | 10 beans | ~$22.50 | $1.13 |
Other Ingredient Costs (Minimal):
- Sugar, water, lemon juice, and optional corn syrup = ~$0.50–$1.00 per batch
Smart Budget Tips
- Buy in bulk: Wholesale or online spice retailers offer beans at half the price of grocery stores.
- Use Grade B beans: Less moist than Grade A, but perfect for extraction and paste.
- Reuse the pods: Once simmered, rinse and dry the pods. Use them in:
- Vanilla sugar (store in a jar of sugar)
- Homemade ice cream base
- Simmer pots for natural fragrance
Taste, Texture, and Aroma Guide
If you’ve only ever used vanilla extract, your first experience with homemade vanilla paste will be transformative. This isn’t just a substitute—it’s an upgrade. Every spoonful brings depth, warmth, and complexity that can elevate even the simplest recipe.
Taste Profile
The flavor of this vanilla paste recipe is:
- Bold and concentrated – One teaspoon packs as much intensity as a whole vanilla bean
- Sweet but balanced – Thanks to the sugar syrup base, but never cloying
- Floral and earthy – Especially when using Madagascar or Tahitian beans
- Slightly woody and spicy – With undertones that develop on the tongue after baking
This isn’t a one-note flavor. It blooms. The paste brings both immediate impact and a lingering warmth. When used in baked goods, it adds a richness that’s often missing from alcohol-based extract.
Texture Breakdown
Visually and texturally, vanilla bean paste is one of the most beautiful baking ingredients.
- Thick and spoonable – Similar to corn syrup or honey, depending on how long you simmer it
- Speckled with real vanilla seeds – These tiny black dots make your batter look artisanal
- Smooth and glossy – Especially if strained, though an unstrained version has rustic charm
- Syrupy but pourable – It drips slowly from a spoon, ideal for layering in frostings or fillings
This smooth-yet-syrupy texture allows the paste to distribute evenly in wet or dry batters without sinking or clumping—something extract can’t always do.
Aroma Experience
The scent of fresh vanilla bean paste is unmistakable. Unlike extract, which often smells sharp due to alcohol, this paste smells:
- Warm and inviting
- Deeply floral and slightly smoky
- Sweet, creamy, and rich
When you open the jar, it instantly perfumes your kitchen. Stir it into warm cream or melted butter, and the aroma intensifies, filling the air with the unmistakable scent of real vanilla—comforting, nostalgic, and indulgent.
Comparison to Other Vanilla Forms
| Type | Taste | Texture | Aroma |
| Vanilla Extract | Thin, alcohol-forward | Liquid | Strong but sharp |
| Vanilla Beans | Bold, pure, earthy | Seeds only | Fresh and woody |
| Vanilla Paste | Bold, floral, deep | Syrupy, flecked | Warm and rich |
Verdict: Paste gives you the visual elegance of pods, the flavor power of extract, and the aromatic luxury of both—without the high cost or complexity.
Storage & Shelf Life
Once you’ve made a fresh batch of this vanilla paste recipe, preserving its bold flavor and rich aroma is key. Stored properly, your homemade vanilla paste can last for several months—long enough to carry you through dozens of recipes.
Best Storage Containers
To keep your vanilla bean paste fresh, use a sterilized, airtight container. Ideal options include:
- Glass mason jars with rubber seals
- Amber glass bottles to protect from light exposure
- Small glass spice jars for gifting or dividing large batches
Avoid plastic containers, as they can absorb aroma and degrade the paste over time.
Where to Store
- Refrigerator (Recommended): Keeps the paste fresh, slows down sugar crystallization, and prevents mold.
Shelf life: 6 to 8 months - Cool, dark pantry (Optional for short-term): If the paste was properly simmered and sealed, it can be kept in a dark cupboard for up to 3 months. Still, refrigeration is best.
Important: Always use a clean, dry spoon when scooping the paste. Introducing moisture or food particles into the jar can lead to spoilage.
How to Tell If Vanilla Paste Has Gone Bad
Although this easy vanilla paste is fairly shelf-stable due to the sugar and lemon juice, it can spoil if exposed to air or moisture. Look for:
- Mold or discoloration inside the jar
- Fermented or sour smell instead of sweet and floral
- Crystallized or dry texture (not harmful, but may need gentle reheating to fix)
How to Refresh or Reheat Paste
If your paste thickens too much or crystallizes in the fridge, try this:
- Place the closed jar in a bowl of warm water for 5–10 minutes.
- Stir gently with a clean spoon to restore smooth texture.
- Do not microwave, as this may overheat the sugar and alter flavor.
Can You Freeze Vanilla Paste?
Technically yes, but not recommended. Freezing can cause separation and ruin the syrupy consistency. It’s best to make fresh every 6–8 months or store small jars to use in rotation.
Bulk Prep & Gifting Options
Once you’ve mastered the process of making this fragrant, homemade vanilla paste, you’ll realize how rewarding it is to have a jar ready for baking—and how perfect it is for sharing. Whether you want to stock up for your own kitchen or give it as a holiday or hostess gift, this recipe is easy to scale up without losing quality.
How to Make a Larger Batch
The base recipe yields about ¾ cup (12 tbsp). If you bake often, it’s smart to double or triple the recipe and store it in multiple jars.
Here’s how to scale:
| Batch Size | Vanilla Beans | Sugar | Water | Lemon Juice | Corn Syrup |
| Small (¾ cup) | 6 beans | 1 cup | ½ cup | 1 tsp | 1 tbsp |
| Medium (1½ cups) | 12 beans | 2 cups | 1 cup | 2 tsp | 2 tbsp |
| Large (3 cups) | 24 beans | 4 cups | 2 cups | 4 tsp | 4 tbsp |
Follow the same simmer-blend-cool process outlined earlier. It may take 2–3 minutes longer for syrup to thicken when doubling or tripling.
Storage Tip: Divide into separate small jars to keep the main batch fresh and untouched longer.
Bulk Cooking Tips:
- Use a large heavy-bottom saucepan to prevent scorching when scaling up to 3x or 4x batches.
- You can simmer vanilla beans whole, then blend all at once using a stand blender or immersion blender in the pot.
- Always let large batches cool fully before storing. Dividing into smaller jars while still warm can cause condensation and spoilage.
- Label each jar with the batch date and expiration estimate (usually 6 to 8 months).
Batch Planning Guide: How Much Should You Make?
Here’s how to decide how many batches you’ll need based on your baking frequency:
- Occasional Bakers (1–2x/month): One small batch (¾ cup) lasts 2–3 months.
- Weekly Bakers: Double batch (1½ cups) lasts 1–2 months.
- Baking for a Family or Selling Items: Triple batch (2¼ cups) ensures consistency and saves time.
- Gifting + Home Use: Large batch (3 cups) gives you enough for multiple jars for personal use and 3–6 gift jars.
Reminder: 1 tbsp of paste = 1 tbsp of extract = 1 vanilla bean
Gifting Homemade Vanilla Paste
Gifting this vanilla paste recipe in mini jars is a thoughtful, elegant way to impress family and friends. Whether it’s for the holidays, birthdays, thank-you gifts, or party favors, people appreciate handmade kitchen gifts—especially those that are beautiful, practical, and fragrant.
Here are some tips for How to Package Vanilla Paste:
Jar Selection:
Choose small jars that hold 2 to 4 tablespoons of paste. Options include:
- 2 oz amber glass jars with screw tops
- Mini mason jars with metal bands or corks
- Glass dropper bottles (wide-mouthed for paste)
Make sure all jars are sterilized, completely dry, and tightly sealed before filling.
Labeling Your Jars:
Every jar should include a basic label that features:
- Product name: Homemade Vanilla Bean Paste
- Date made
- Storage: “Keep refrigerated”
- Use: “1 tsp = 1 tsp vanilla extract”
- Optional: Source of beans (Madagascar, Tahitian, etc.)
You can print waterproof labels or write them by hand for a rustic, artisanal touch.
Gift Set Ideas:
Pair the jar with:
- A handwritten recipe using the paste
- A bottle of vanilla sugar (place used pods in a jar of sugar!)
- Wooden measuring spoons
- A cookie mix in a jar
- A reusable baking tin
Wrap in kraft paper, muslin, or burlap for a farm-style look, or place in a clear gift bag with ribbon for a polished, modern finish.
Disclaimer:
Gift jars, if properly sealed and refrigerated, last up to 6 months. For best flavor and freshness, advise your recipient to use it within 3 months and always scoop with a clean spoon.
If shipping or giving in warm weather, pack with an ice pack or ship quickly. Paste is more stable than extract but still benefits from cool storage.
| You may also like to Read: Ultimate Party Ribs Recipe – Quick At Home |
Nutrition Information (Per Tablespoon)
This homemade vanilla paste is naturally sweetened, alcohol-free, and made with pure ingredients. While it’s not something you eat by the spoonful, many home bakers and food bloggers want to know the nutritional content—especially when adding it to low-sugar or health-conscious recipes.
Below is the approximate nutrition breakdown for 1 tablespoon (about 20 grams) of vanilla paste made with sugar, corn syrup, water, and 6 vanilla beans.
| Nutrient | Amount per 1 tbsp |
| Calories | 50–60 kcal |
| Total Fat | 0 g |
| Saturated Fat | 0 g |
| Trans Fat | 0 g |
| Cholesterol | 0 mg |
| Sodium | 2–5 mg |
| Total Carbohydrates | 14–15 g |
| Dietary Fiber | 0 g |
| Sugars | 13–14 g |
| Protein | 0 g |
| Alcohol | 0 g |
| Vanillin (flavor compound) | ~0.5–1 mg |
Notes:
- If you omit corn syrup, total sugar and calories may drop by ~5–10%.
- Using coconut sugar or maple syrup as substitutes will slightly increase calorie content.
- Contains natural antioxidants and flavor compounds found in real vanilla beans, including vanillin and trace minerals.
While not a health food, this easy vanilla paste contains no preservatives, artificial flavors, or chemicals—unlike some commercial versions.
Pro Tips for the Best Homemade Vanilla Paste
Whether this is your first batch or your tenth, these insider techniques will take your homemade vanilla paste from good to exceptional. These tips come from chefs, food scientists, and seasoned home bakers who value bold flavor, clean ingredients, and efficiency.
Use Fresh, Moist Vanilla Beans
- The fresher the beans, the bolder and deeper the flavor.
- Choose Grade A or B depending on your budget:
- Grade A beans are plumper, easier to scrape, and more aromatic—ideal for single batches.
- Grade B beans are drier but more affordable—perfect for bulk or extraction recipes.
- Avoid shriveled or brittle beans—they’ve lost their oils and complexity.
Scrape Slowly & Thoroughly
- Take your time scraping the seeds. Use the flat edge of the knife and press firmly but gently to remove every bit of caviar.
- After scraping, chop the pods roughly and steep them in the syrup. They hold plenty of residual oils that enhance the final taste.
Simmer Low, Never Boil
- High heat will burn the sugars and damage the aromatic compounds in the vanilla.
- Keep the syrup just below a boil—tiny bubbles around the edges are enough.
- If it starts boiling, remove from heat and let it settle before returning.
Let the Paste Sit Overnight (Optional, But Recommended)
- For deeper infusion, let the blended paste rest in the fridge for 12–24 hours before first use.
- This “aging” step allows the sugars and vanilla to fully marry, producing a smoother, more potent flavor.
Stir Before Each Use
- Vanilla seeds tend to settle slightly over time. Stirring ensures a uniform flavor and even seed distribution in your batter or mix.
Use Amber Jars to Protect Flavor
- Vanilla compounds are light-sensitive. Use dark-colored jars or store clear ones in a cupboard to prevent oxidation and fading.
- Avoid metal lids that may react with lemon juice or syrup—choose non-reactive lids or line metal tops with parchment or waxed paper.
Reuse the Pods Creatively
- After you remove the beans from the syrup or blender, don’t discard them. Dry them on a rack and reuse to make:
- Vanilla sugar
- Infused cream or milk
- Simmer pot fragrance
- Homemade vanilla extract (with leftover pods and alcohol)
Mistakes to Avoid When Making Vanilla Paste
Even though this homemade vanilla paste is simple to prepare, a few small missteps can significantly impact its texture, flavor, or shelf life. Here’s what you should absolutely avoid to ensure your vanilla paste turns out bold, smooth, and delicious—every single time.
Using Low-Quality or Stale Vanilla Beans
- Vanilla paste relies on the richness of real vanilla beans—if your beans are dry, brittle, or flavorless, the final paste will be weak and uninspiring.
- Always check for beans that are moist, glossy, and pliable. If they crack when bent, they’re likely too old.
Pro tip: Buy from reputable spice vendors or online stores that specialize in bulk vanilla beans, and avoid beans sitting too long in grocery displays.
Skipping the Pod Infusion Step
- After scraping out the seeds, don’t toss the pods. The outer shell of the vanilla bean still contains essential oils and subtle notes that contribute to the flavor.
- If you skip infusing the pods in the syrup, your paste may taste flat or one-dimensional.
Always simmer the pods along with the seeds for full flavor extraction.
Overheating or Boiling the Syrup
- Heat destroys the delicate aromatic compounds in vanilla.
- If your syrup starts to boil rapidly or caramelize, you’ll end up with a paste that smells cooked, bitter, or burnt rather than fragrant and sweet.
Solution: Keep the heat low, stir regularly, and remove the pan from heat as soon as the syrup thickens slightly.
Not Blending Long Enough
- A quick blitz in the blender might leave the paste grainy, watery, or separated.
- You want a fully emulsified consistency, with evenly dispersed seeds and no visible sugar granules.
Blend for at least 30–45 seconds, or until you have a smooth, glossy texture.
Skipping Straining (If You Want Smooth Texture)
- Leaving pod bits in the paste is fine for rustic bakes, but if you want a professional look for glazes, custards, or panna cotta, you must strain.
- Skipping this step can make your paste feel gritty or leave fiber streaks in silky recipes.
Use a fine mesh strainer or cheesecloth for best results.
Poor Storage Habits
- Leaving the paste in plastic containers, near heat sources, or uncovered in the fridge will spoil the paste quickly.
- Using a wet or dirty spoon can also introduce bacteria or mold.
Always store in airtight glass jars, refrigerate after cooling, and label with the date to keep track.
Not Stirring Before Use
- Over time, vanilla seeds may settle at the bottom. If you don’t stir or shake the jar before scooping, the paste you use won’t have the full flavor.
- You’ll also end up with uneven speckling in your baked goods.
Just a quick stir with a clean spoon solves this issue instantly.
| Try our Slow Cooker Chicken Legs Recipes – easy, juicy, and worth the wait for fall-off-the-bone flavor. |
Taste Variations for Homemade Vanilla Paste
One of the most exciting parts of making your own vanilla paste recipe is the freedom to experiment with flavor. While the classic version delivers that deep, bold vanilla flavor, you can easily enhance it with spices, extracts, or even floral notes to match different recipes or seasons.
Below are several creative twists you can use to create signature variations of this easy vanilla paste—perfect for baking, beverages, or gourmet gifting.
Cinnamon Vanilla Paste
Add ½ teaspoon of ground cinnamon to the syrup before simmering. This brings a warm, spicy edge that pairs beautifully with:
- Apple pie
- French toast
- Pumpkin bread
- Cinnamon rolls
You can also drop in ½ of a cinnamon stick during the simmer, then remove it before blending.
Cardamom-Infused Vanilla Paste
Cardamom adds a gentle floral spice, popular in Indian and Middle Eastern desserts. Add:
- ¼ teaspoon of ground cardamom or
- 4 crushed green cardamom pods
Simmer them along with the vanilla pods, then strain before blending for a subtly exotic note. Try this in:
- Rice pudding
- Chai-spiced cakes
- Pistachio cookies
Citrus Vanilla Paste
Brighten up the paste with a fresh citrus twist by adding:
- Zest of ½ orange or lemon to the syrup
- Use in recipes where vanilla meets fruit:
- Blueberry muffins
- Lemon pound cake
- Orange creamsicle frosting
Citrus zest pairs especially well with Tahitian vanilla beans, which have fruity undertones.
Almond-Vanilla Fusion
Add ¼ teaspoon of pure almond extract after blending the paste and while it’s cooling. This combo creates a powerful, marzipan-like aroma that’s delicious in:
- Amaretti cookies
- Cherry desserts
- Croissants or Danish fillings
It’s sweet, nutty, and ideal for recipes with stone fruits or chocolate.
Lavender or Floral Vanilla Paste
For a soothing, aromatic twist, add:
- ½ teaspoon of food-grade dried lavender buds
- Simmer with the vanilla pods, then strain before blending
Perfect in custards, ice cream, whipped cream, or spring/summer baking. You can also try a drop of rose water or orange blossom water for elegant floral notes.
Spiced Holiday Blend
Create a festive version by combining:
- ¼ tsp cinnamon
- Pinch of clove or nutmeg
- Optional drop of maple extract
This version is fantastic in:
- Gingerbread cookies
- Eggnog custards
- Holiday pound cakes
How to Add Variations Safely
- Always simmer spices with the vanilla pods, not after blending—this allows better flavor infusion and easy straining.
- Avoid extracts that contain alcohol if you want to keep your paste alcohol-free.
- When using strong flavors (like almond or floral waters), start small—you can always intensify later, but overpowering vanilla defeats the purpose.
Final Thoughts
If you’ve only used store-bought extract, this vanilla paste recipe will feel like a secret ingredient you’ve been missing. It’s bold, fragrant, smooth, and full of those beautiful black vanilla specks that signal real, high-quality flavor. Whether you’re baking cakes, making custards, or flavoring your morning coffee, this paste brings a level of richness and aroma that can’t be matched by commercial bottles.
What makes this homemade vanilla paste so special isn’t just its deep flavor—it’s the fact that you crafted it yourself. You chose the beans, simmered the syrup, blended it to perfection, and now you control exactly what goes into your baking. It’s a small luxury that elevates everyday recipes into something more meaningful and memorable.
Plus, with all the ways to customize, store, and gift it, this paste goes beyond your own kitchen—it becomes a conversation starter, a thoughtful gift, and a reflection of your care and creativity.
Give it a try and make it your own. One bite, and you’ll know why this recipe might just become your new favorite go-to dinner.
check out our other recipes, visit TastyShade Happy cooking, and enjoy every bite!
FAQ’s
What is vanilla paste and how is it different from vanilla extract?
Vanilla paste—also called vanilla bean paste—is a thick, syrupy blend made from real vanilla beans, sugar, and a binder like corn syrup or glycerin. Unlike vanilla extract, which is thin and alcohol-based, vanilla paste includes actual vanilla bean seeds (the tiny black specks) for richer flavor and visual appeal. It offers the bold intensity of whole vanilla beans in an easy-to-measure format.
Can I use store-bought vanilla paste in place of vanilla beans?
Yes, vanilla paste is a great substitute for whole vanilla beans. Use 1 tablespoon of vanilla paste in place of 1 vanilla bean pod in any recipe. You’ll still get the deep flavor and those signature specks without the hassle of slicing and scraping beans.
How do I make vanilla paste at home using real vanilla beans?
To make homemade vanilla paste, simmer sliced vanilla beans in a sugar syrup, blend the mixture (including seeds and pods), and strain if desired. Combine the puree with lemon juice and corn syrup for texture and shelf life. The result is a thick, fragrant paste you can store in the fridge for months. It’s cheaper than store-bought and completely customizable.
How long does homemade vanilla paste last when stored properly?
Properly stored in a clean, airtight glass jar in the refrigerator, homemade vanilla paste can last 6 to 8 months. Always use a clean spoon to scoop it, and check for any off smells or signs of mold. Paste made without preservatives or alcohol should always be kept chilled.
Is vanilla paste vegan and gluten-free by default?
Most vanilla paste recipes are naturally vegan and gluten-free, especially if you use organic cane sugar and a corn syrup base. However, store-bought versions may contain fillers, alcohol, or stabilizers, so always check the label if you have dietary restrictions.
What’s the correct conversion between vanilla paste, extract, and beans?
Here’s a quick guide for conversions of vanilla paste recipe:
- 1 teaspoon vanilla extract = 1 teaspoon vanilla paste
- 1 vanilla bean = 1 tablespoon vanilla paste
This makes vanilla bean paste easy to substitute in nearly any recipe—especially baked goods and custards that benefit from its thick texture and strong aroma.
Can I substitute vanilla paste for vanilla extract in baking recipes?
Absolutely. Vanilla paste works beautifully in baking and can be used in equal amounts as vanilla extract. It adds deeper flavor and attractive specks to cakes, cookies, frostings, and ice cream. Just remember it’s slightly thicker, so in very sensitive recipes like meringues, you may want to adjust liquids slightly.
Does vanilla paste lose its flavor over time in the refrigerator?
While vanilla paste recipe holds its flavor longer than extract (especially when stored cold), it can lose intensity after 6–8 months. Exposure to light, heat, or air will degrade its quality. Keep it in a dark glass jar in the fridge and always seal tightly after use.
What are the health benefits of using vanilla paste over extract?
Homemade vanilla paste recipe is alcohol-free and free of synthetic vanillin or additives often found in commercial extracts. It’s a cleaner, more natural option with real antioxidant properties from the vanilla bean. While it’s still sweetened, it avoids the harsh alcohol taste and is safer for recipes served to kids or non-drinkers.
Can I add cinnamon or other spices to my vanilla paste recipe?
Yes, you can enhance your vanilla paste by infusing it with spices like cinnamon, cardamom, or nutmeg. Simply simmer the spices along with the vanilla beans during the syrup step, then blend as usual. These variations are great for holiday baking or gifting and add depth to the already bold vanilla flavor.
Such a lovely, pure vanilla flavor.
I absolutely love baking with vanilla paste. It’s so convenient, yet delivers that rich, authentic vanilla bean taste without the fuss.
Love how rich and vanilla paste makes everything!